How To Clean A Pet's Ears

Cleaning your pet's ears the right way keeps them comfortable and helps prevent painful infections, so learning how to clean a pet's ears is an essential part of responsible care. Many guardians overlook ear maintenance until redness, odor, or scratching signals a problem, but a gentle, consistent routine can stop issues before they start. Whether you have a floppy-eared dog, a curious cat, or a small pet that tolerates handling, understanding the basics of ear anatomy and safe cleaning methods makes the process easier for both of you.
Understand your pet's ear anatomy
Before you begin any cleaning routine, it helps to know what you are working with, because the structure of the ear canal directly affects how to clean a pet's ears safely. The outer ear funnels sound, the middle ear contains delicate bones and an eardrum, and the inner ear manages balance, so harsh cleaning or inserting objects deep into the canal can cause serious harm. Instead of probing far inside, focus on cleaning the visible part of the ear canal and the outer folds, where wax, dirt, and moisture tend to build up, especially in breeds with long or drooping ears.
Each species and even each breed can have subtle differences in ear shape and skin sensitivity, which is why learning how to clean a pet's ears for your particular companion matters more than following a one-size-fits-all approach. Dogs with heavy ears or narrow canals are more prone to moisture retention and yeast growth, while cats may need less frequent cleaning but still benefit from regular checks. By paying attention to color, smell, and texture, you can spot early signs of irritation and adjust your technique or frequency accordingly.
Gather the right supplies
Using safe, gentle products is key when you learn how to clean a pet's ears, because human ear drops, alcohol, or hydrogen peroxide can irritate sensitive tissues and disrupt the natural balance of the ear. Look for a veterinarian-recommended ear cleaner that is specifically labeled for cats or dogs, and choose a formula that matches your pet's needs, such as soothing aloe or mild acidic solutions that help control yeast. You will also want soft cloths or cotton balls, treats for positive reinforcement, and a towel in case your pet shakes during the process.
Before you begin cleaning, take a moment to inspect the ears for cuts, swelling, strong odor, or unusual discharge, because these signs may mean you should pause and consult a professional instead of continuing at home. Keep treats nearby so you can reward calm behavior, and consider warming the ear cleaner slightly in your hands to make the experience more comfortable. Having everything organized in advance makes the actual cleaning quicker and less stressful, which helps your pet associate ear care with positive interactions rather than fear.
Prepare your pet for ear cleaning
A calm pet is easier and safer to work with, so part of knowing how to clean a pet's ears is choosing the right time and place. Pick a quiet area where your animal already feels relaxed, such as a familiar room or a non-slip surface, and avoid starting when they are overly energetic or anxious. If your pet tends to wiggle, ask a helper to gently hold them or offer a distraction like a favorite toy or lick mat so you can focus on one ear at a time without rushing.

Take a moment to talk in a soft, reassuring tone and offer a small treat before you even touch the ears, building a positive connection to the routine. For dogs, a quick walk beforehand can reduce fidgeting, while cats may respond well to a gentle chin scratch before you introduce your hands. The more you practice short, pleasant handling sessions, the easier it becomes to apply how to clean a pet's ears steps without turning it into a battle.
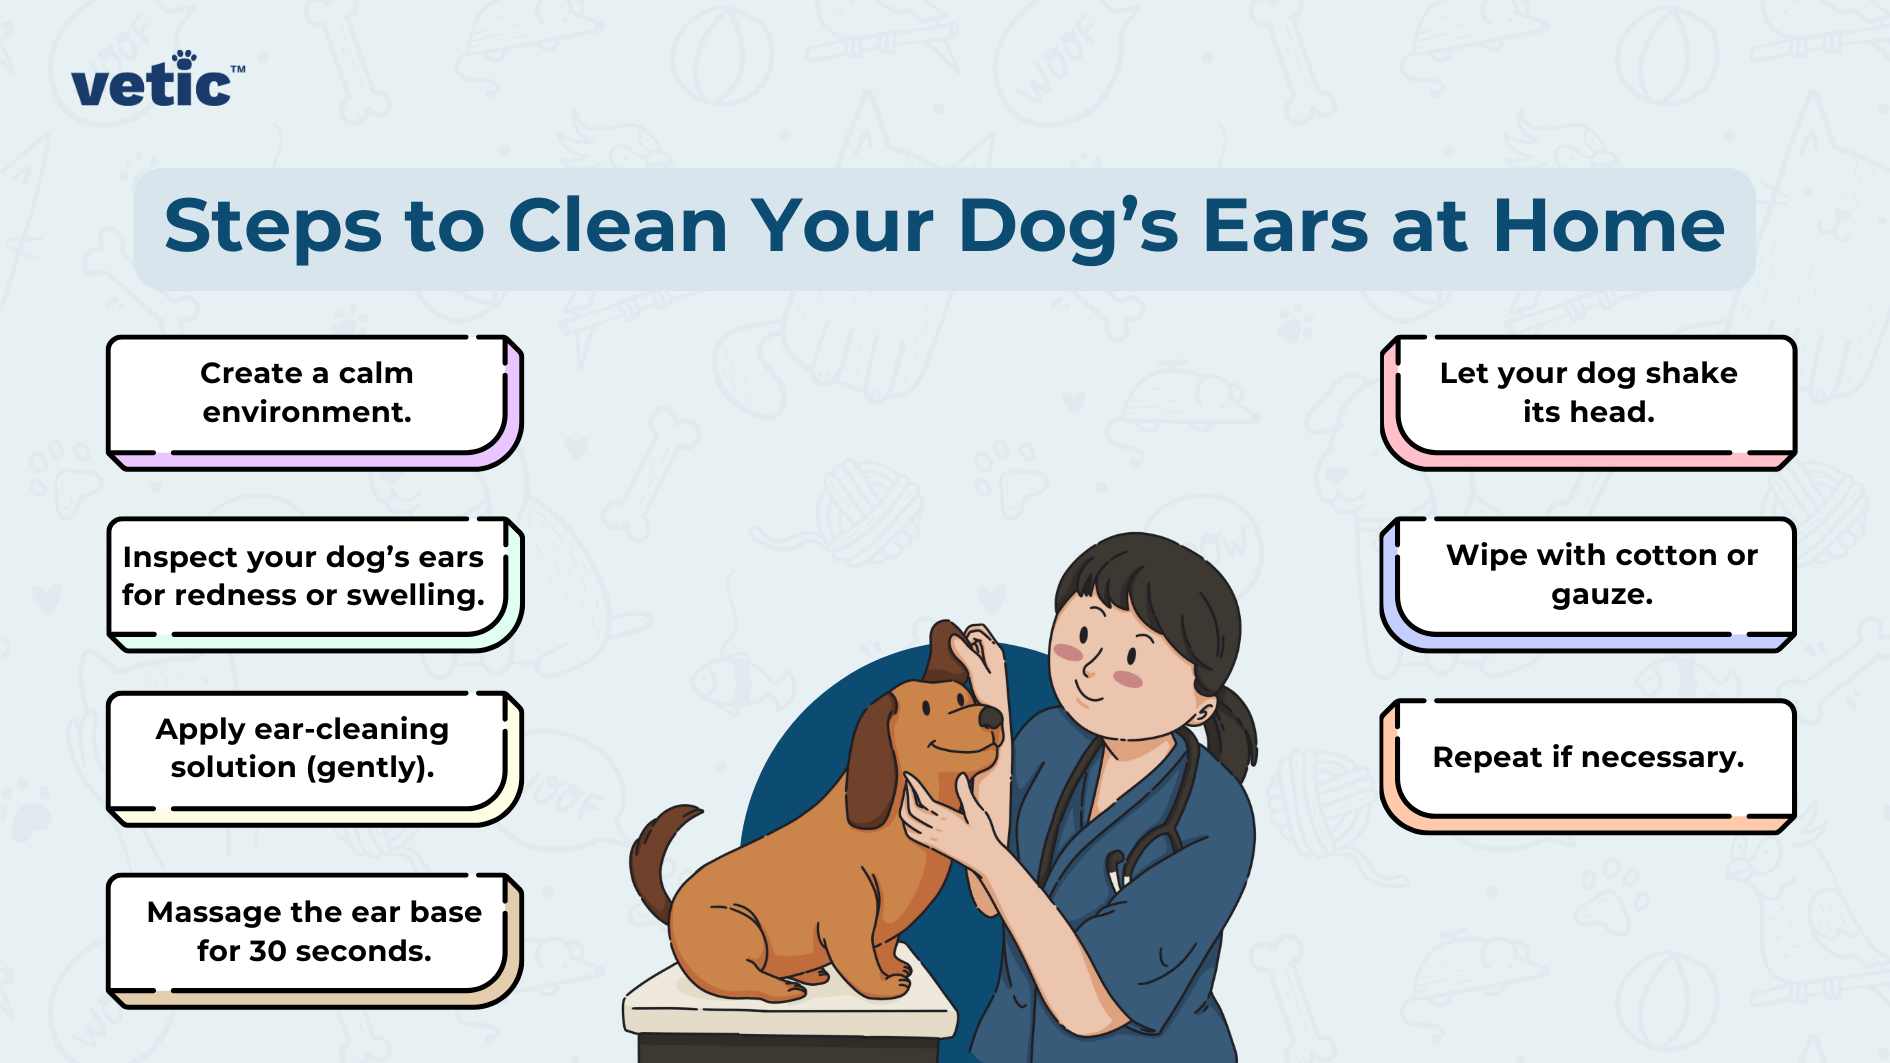
Step-by-step cleaning process
Start by holding the ear flap upright and gently squeezing a small amount of the veterinarian-approved cleaner into the canal, being careful not to touch the tip of the bottle to the ear to avoid contamination. Massage the base of the ear for about fifteen to thirty seconds, which helps loosen debris and work the solution deeper, and you will often hear a soft squishing sound as the cleaner moves around. After massaging, let your pet shake their head, which brings loosened material to the surface and reduces the risk of pushing debris further inward.
Once the ear has shaken, use a soft cloth or cotton ball to wipe away any visible wax and dirt from the outer ear and the underside of the flap, taking care not to insert anything deep into the canal. Work with gentle, downward motions and replace the cloth or cotton ball frequently so you are not just moving dirt around. If your pet shows signs of pain, stops allowing you to touch their ears, or you see persistent redness or odor, it is time to pause and seek advice from a veterinarian rather than continuing how to clean a pet's ears at home.

Establish a safe frequency and routine
How often you clean depends on your pet's lifestyle, breed, and individual needs, so there is no single rule that fits every animal, yet consistency is more important than strict scheduling. Dogs that swim frequently or live in humid climates may need weekly or biweekly gentle cleanings to manage moisture, while cats and many indoor dogs do well with monthly checks or only when you notice a little buildup. Learning how to clean a pet's ears in a slow, predictable way helps your companion feel secure and makes each session shorter and smoother.
Combine ear care with other regular grooming habits, such as brushing and nail trims, so it becomes part of a familiar self-care routine rather than a random surprise. Keep notes about what works, including the type of cleaner, timing, and your pet's comfort level, so you can adjust technique or frequency over time. By pairing gentle handling, positive rewards, and attentive observation, you can maintain healthy ears and strengthen trust with your companion.
Know when to seek professional help
Even if you are confident about how to clean a pet's ears, it is important to recognize signs that indicate a problem beyond routine maintenance, such as persistent redness, swelling, discharge, foul odor, or constant scratching. These symptoms can point to infections, allergies, ear mites, or other conditions that require veterinary diagnosis and treatment, and attempting to clean aggressively or use unapproved remedies can make things worse. If you notice pain when you touch the ear, your pet becomes suddenly head-shy, or you see changes in balance or hearing, schedule a visit with your veterinarian promptly.
:strip_icc()/how-to-clean-your-dogs-ears-1118393_sourcefile-e5f226fcff0a48f7b9ca85258bb388fb.jpg)
Professional guidance can also help you refine your at-home routine, because a veterinarian or veterinary technician can demonstrate proper technique, recommend the safest products for your pet, and address concerns about underlying health issues. Regular check-ups combined with careful home care mean that cleaning becomes a preventive habit rather than a reaction to advanced problems, supporting long-term comfort and hearing health. By staying informed and gentle, you turn ear care into a quiet moment of bonding that keeps your pet feeling their best.
Vet Shares 1 Simple Way To Clean Your Dogs Ears
Cleaning your dog's ears can be simple, easy and you can do it at home. If it's your first time or have had problems in the past then ...
