How To Draw A Dog By Steps
Learning how to draw a dog by steps is easier than you think, and this friendly guide will help you capture personality on paper with simple, clear actions.
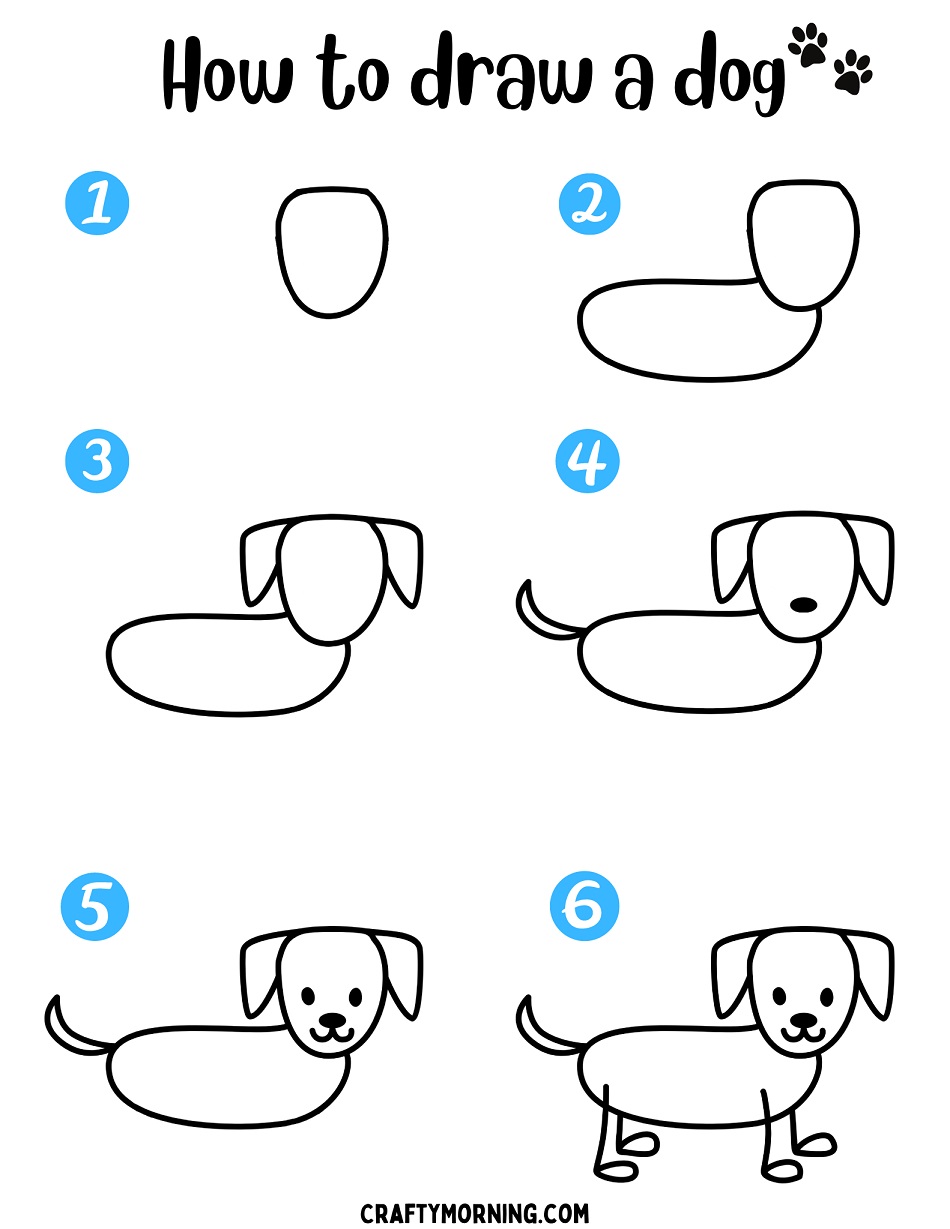
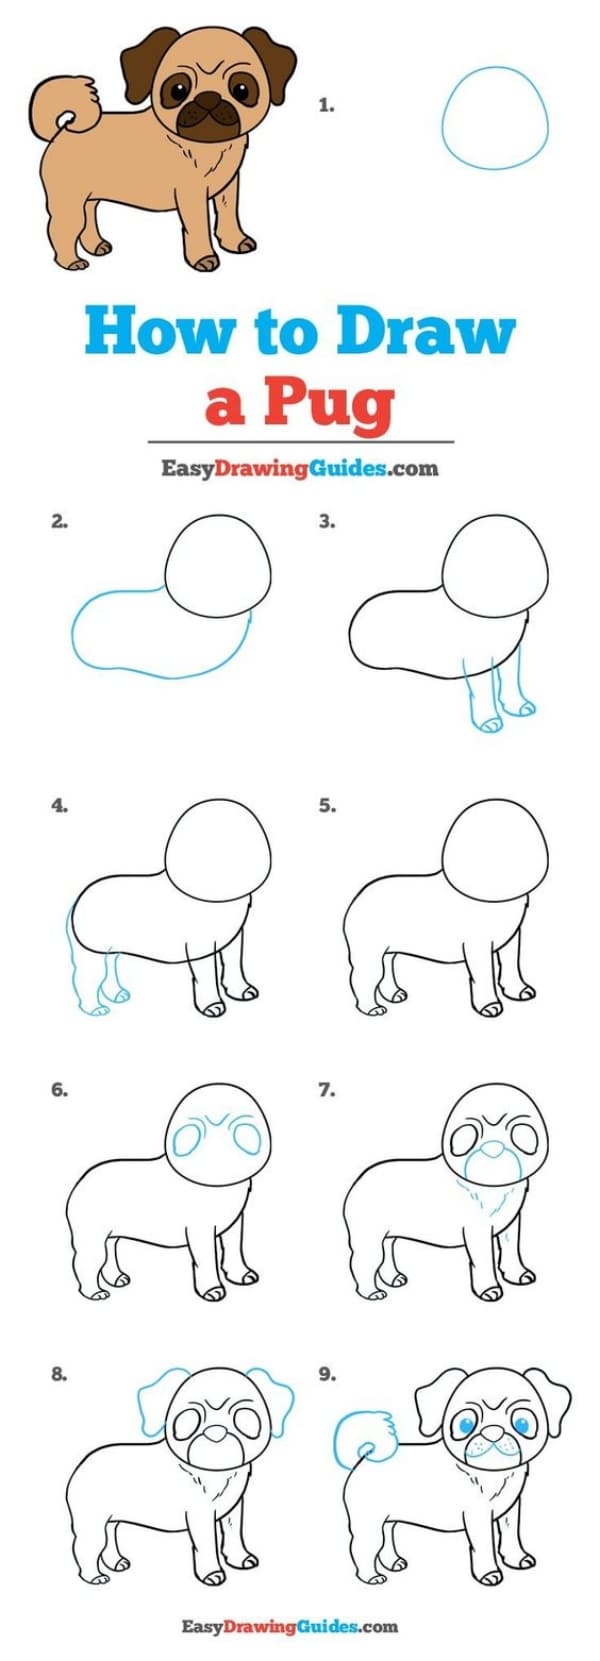
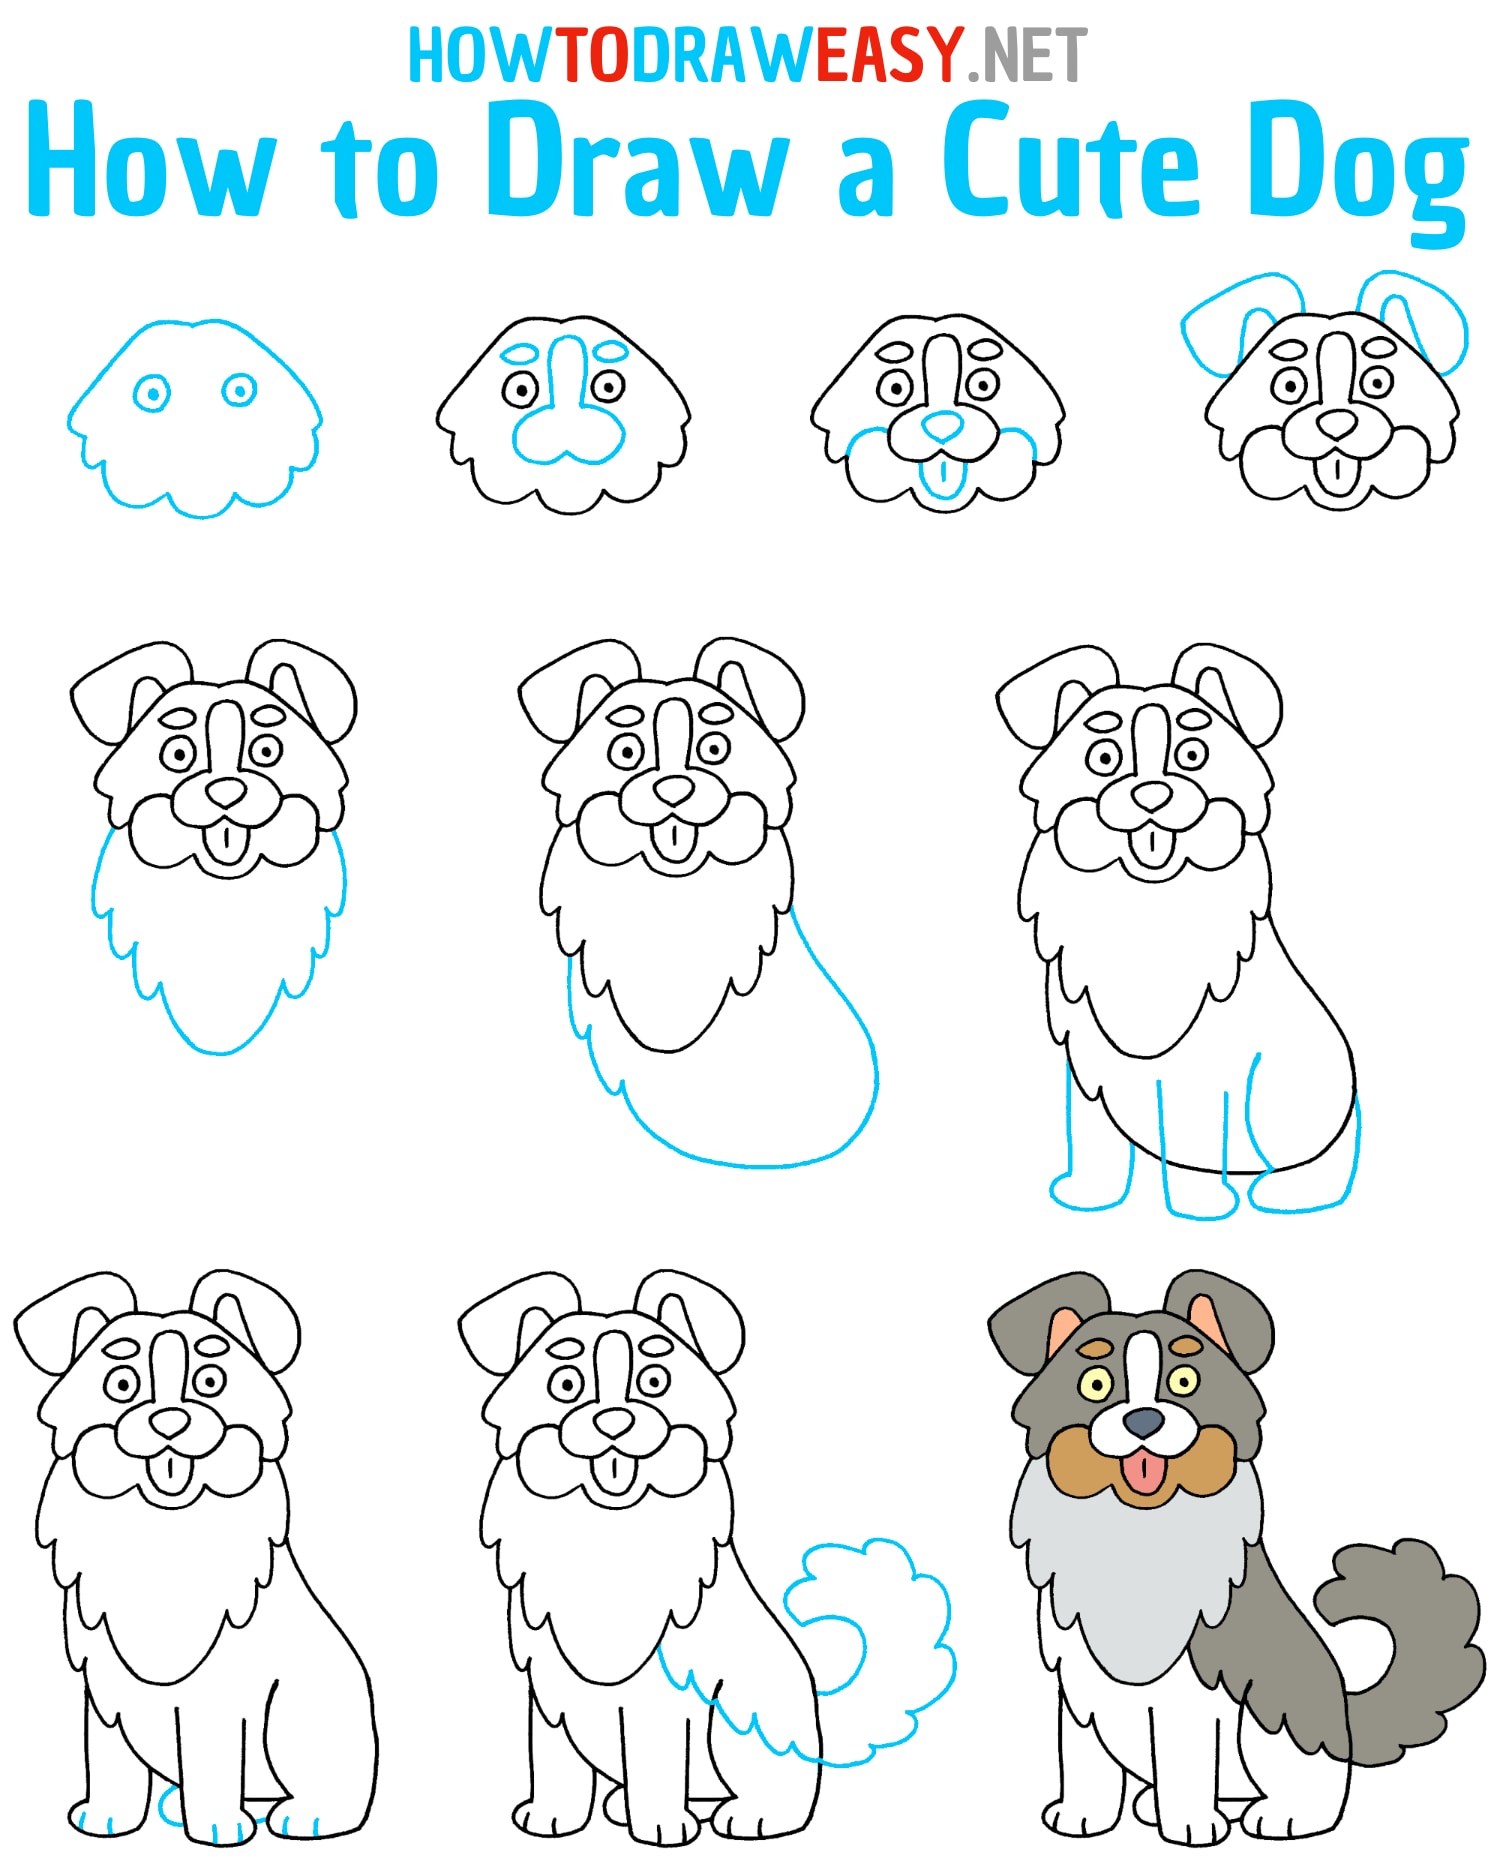
Start with basic shapes to build the structure
When you begin how to draw a dog by steps, the most helpful approach is to ignore details at first and focus on big, simple forms. Sketch a circle for the head and an overlapping oval or egg shape for the body, making the body slightly longer for a natural dog proportions feel. Add a small triangle or rounded shape for the snout and two almond shapes for the eyes, keeping them loose so you can adjust size and position easily.
Next, use curved lines to connect these shapes, suggesting the neck, back, and chest without pressing too hard. Think of these guidelines as a gentle framework that tells you where the legs and tail will live later. By starting this way, you create a solid skeleton for your drawing, which makes the later steps of how to draw a dog by steps much more predictable and less intimidating.
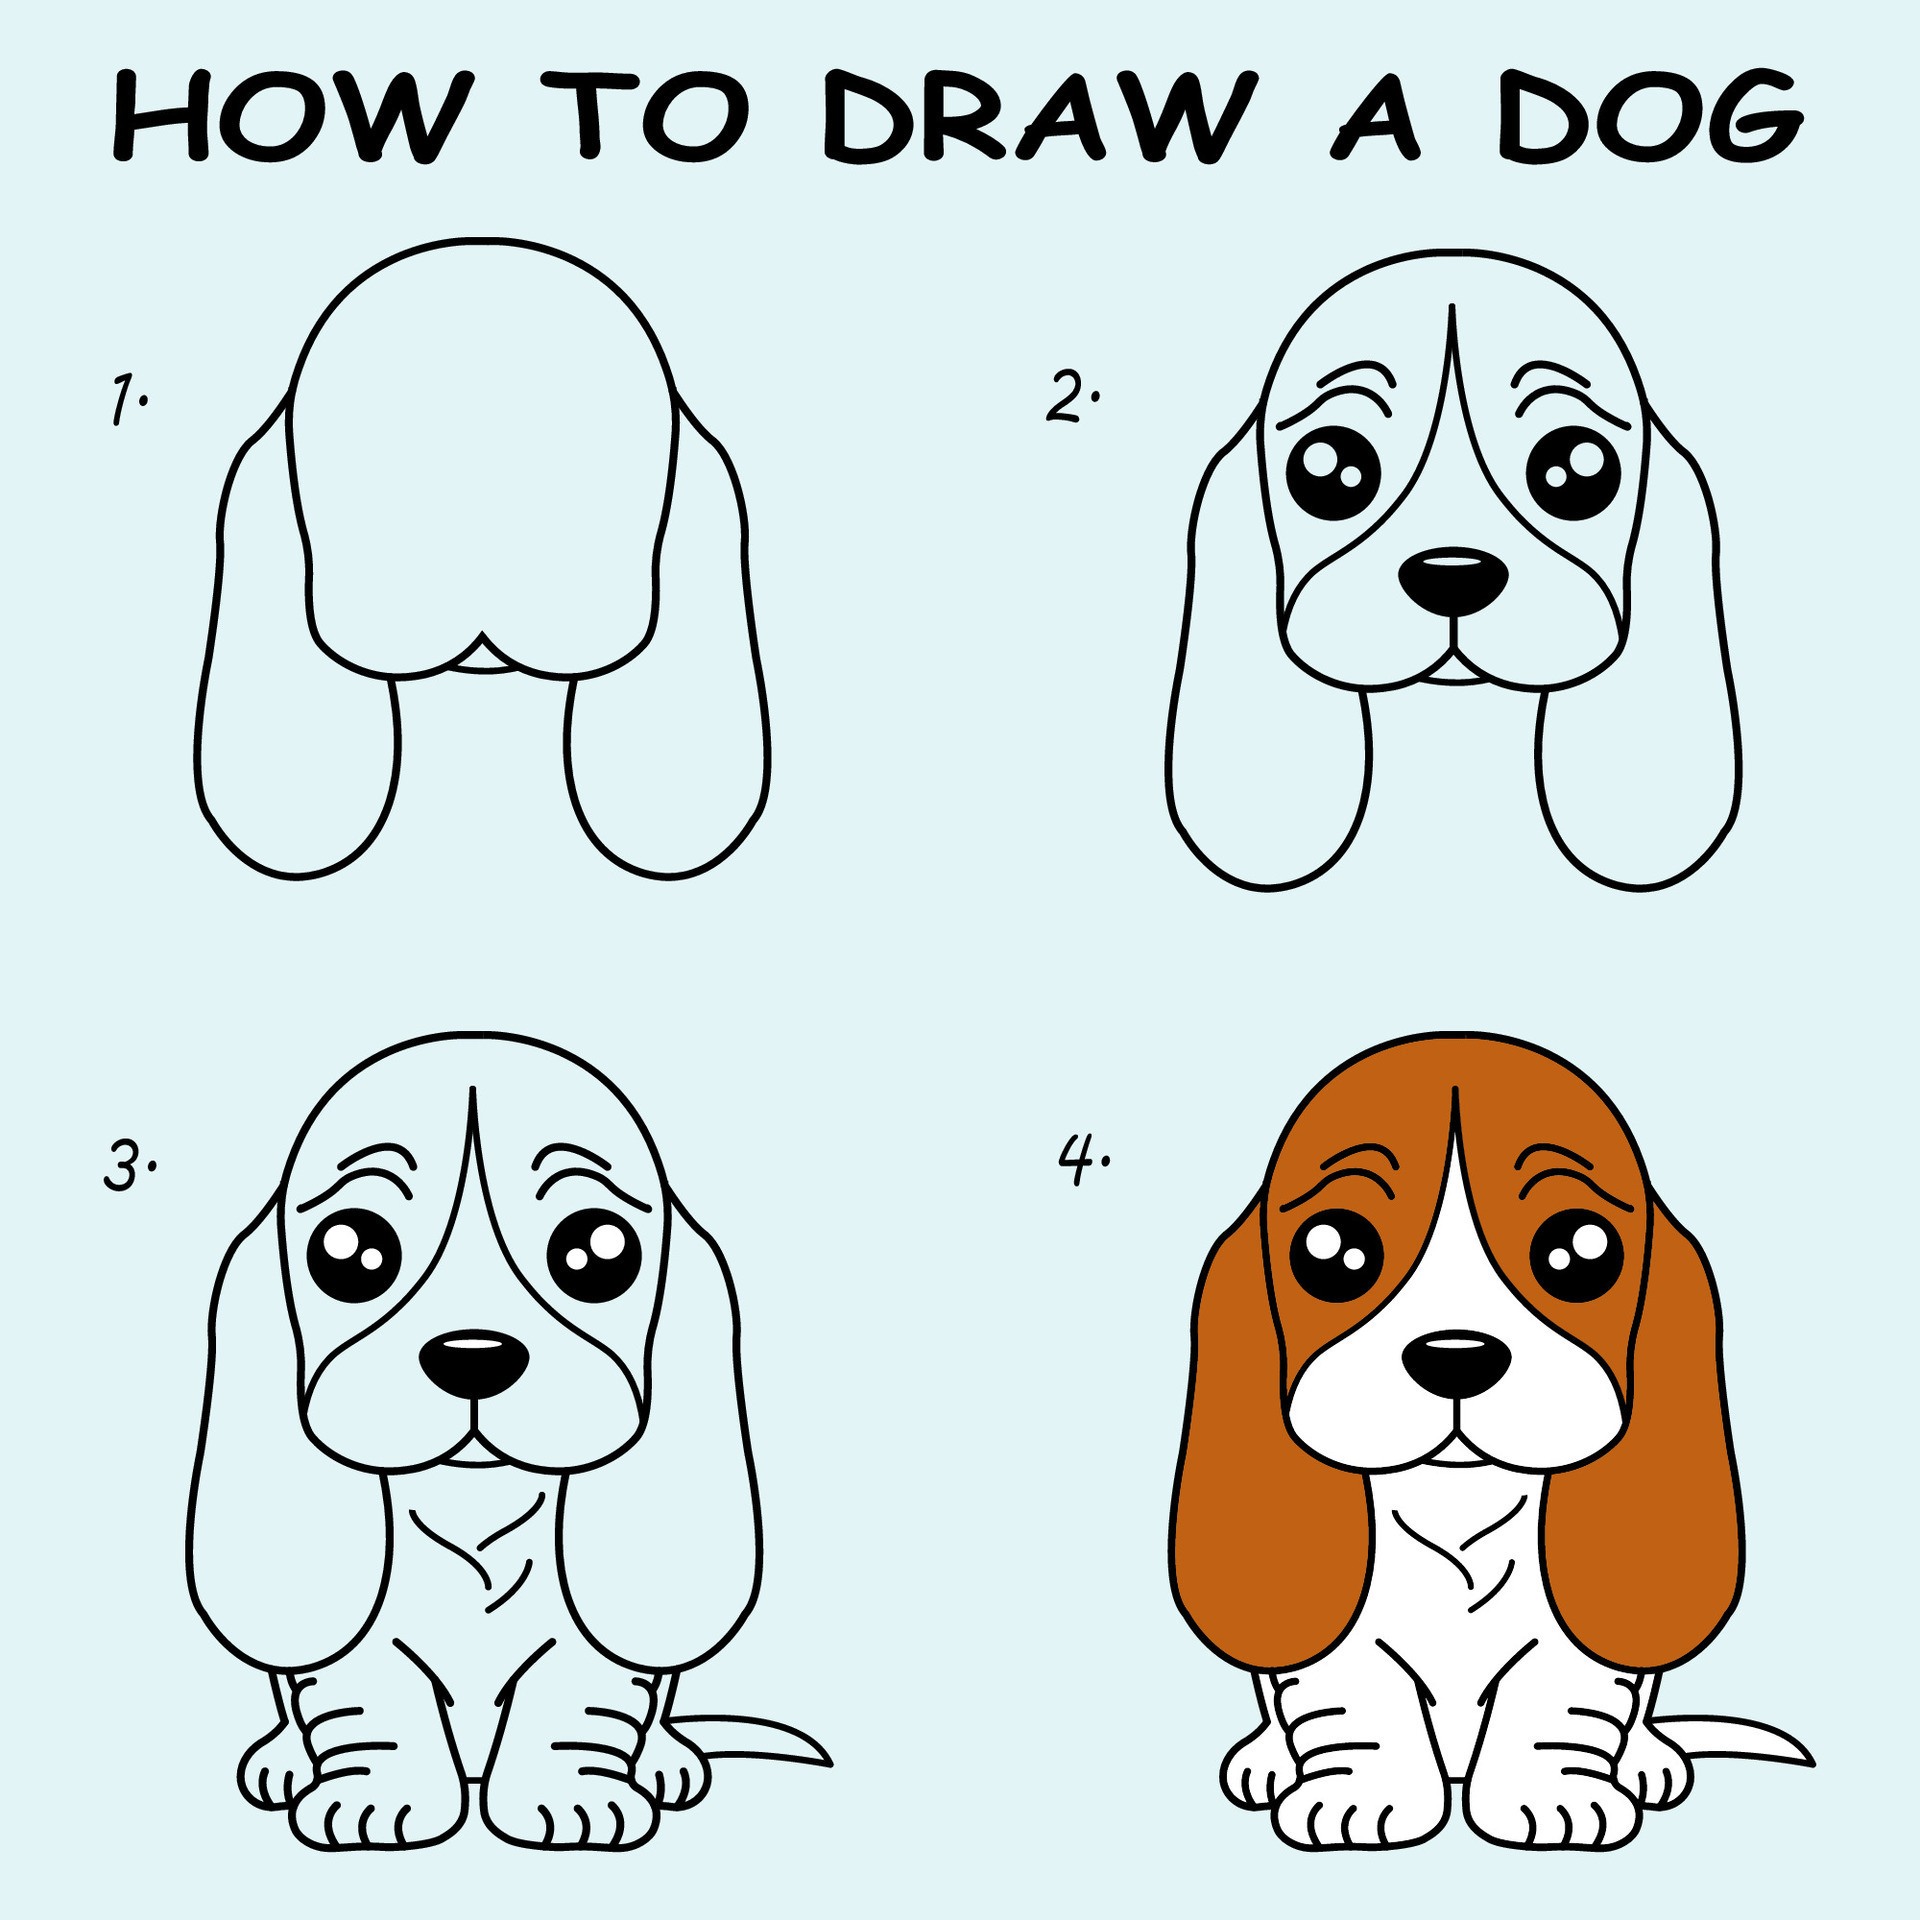
Refine the head and add facial features
Once your basic framework is in place, it is time to shape the head more clearly, which is a key part of how to draw a dog by steps that brings your character to life. Redraw the head outline using smoother curves, narrowing the muzzle a bit and giving the skull a more three dimensional feel with a subtle arc along the top. Place the eyes a little above the midpoint of the head, leaving enough space between them to suggest width and alertness.
Add simple nostrils at the tip of the muzzle, a small curved line for a smile or a softer line for a neutral mouth, and a tongue if you want to show playfulness. You can also hint at ears at this stage, using floppy, pointy, or folded shapes depending on the breed you are imagining. These facial details are powerful in how to draw a dog by steps because they communicate expression and mood without complex techniques.
Outline the body and legs with confident lines
With the head shaped, move down the body and focus on how to draw a dog by steps that define the chest, waist, and hips in a natural flow. Thicken the main outline where it matters, such as along the shoulders and thighs, to show the strength of a dog’s musculature while keeping the lines graceful rather than blocky.
Sketch the legs as slightly angled cylinders, noting where the joints bend so the paws will land convincingly on the ground. For the tail, use a curved or flowing line that follows the rhythm of the back, thickening it near the base and tapering toward the tip. By cleaning up your guidelines into confident outlines at this stage, you set the stage for the final textures and details in how to draw a dog by steps.
Define paws, claws, and textured details
Paws are essential to make your dog drawing look stable and realistic, so spend a little extra time on this area as part of your how to draw a dog by steps process. Each paw has four toes arranged in a fan shape, with pads that are slightly oval and a little darker in value to suggest cushion. Add a small curved claw at the end of each toe, keeping them aligned with the direction of the step you imagine the dog is taking.
To convey fur, you do not need to draw every strand; instead, use short, overlapping strokes that follow the direction of growth around the neck, back, and tail. Vary the length and density of these marks, pressing harder in shadow areas and lighter in highlights. This texturing work is a satisfying part of how to draw a dog by steps that turns a flat sketch into a lively, tactile image.
Shade with light and shadow to create volume
Shading is where your how to draw a dog by steps truly becomes three dimensional, so think about where your light source is coming from before you begin. Imagine a single light direction, then mark the core shadows on the underside of the body, between the legs, and beneath the chin, keeping the edges softly blended. Use the side of your pencil or gentle strokes to build mid tones, leaving the brightest areas untouched for a natural glow.
Strengthen the darkest accents in the ear folds, eye sockets, and between the toes, and add subtle gradients on the snout and legs to emphasize roundness. You can also vary line weight, making the outer contour slightly darker to frame the figure. By mastering light and shadow in this phase of how to draw a dog by steps, you give your drawing depth and personality that feels alive.
Finalize expression and refine minor details
Near the end of how to draw a dog by steps, step back, look at the whole picture, and ask yourself whether the pose reads clearly and the face shows the emotion you intended. Adjust the tilt of the head, the curve of the tail, or the angle of the ears until the dog feels balanced and ready to move. Soften any harsh lines with a light touch, and reinforce important contours where you want the eye to travel.
You might add highlights in the eyes, a few extra furs strands around the cheeks, or subtle pattern marks if you are drawing a spotted or brindle coat. Remember that small refinements make a big difference, so resist the urge to overwork the drawing. When you finish this last phase of how to draw a dog by steps, you will have a clear, expressive piece that reflects your own style and confidence.
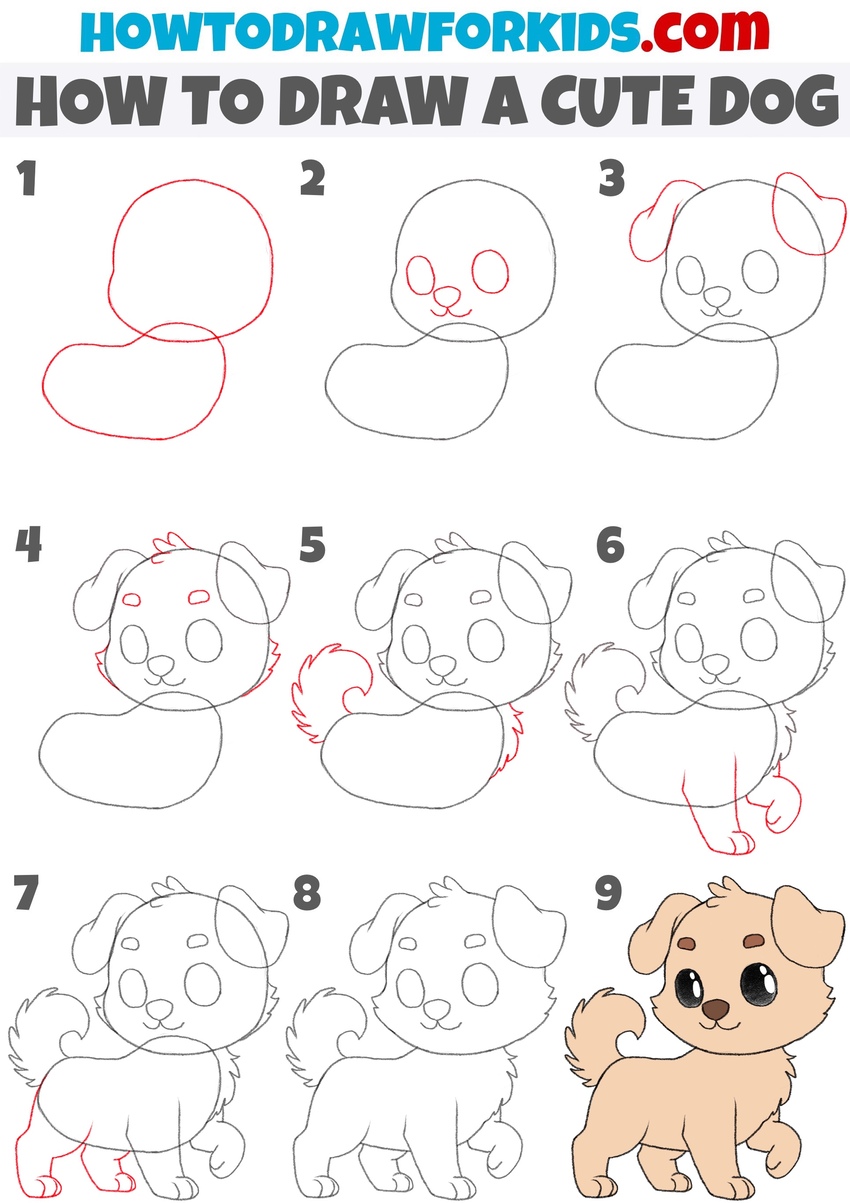
By following these structured steps, you build skills gradually, turning a simple idea into a realistic dog drawing that feels full of movement and charm.
How to draw Dogs - A Tutorial for Children!
Hello! This video is something a little different - I created it for the Watergate Bay Hotel here in Newquay for them to play in their ...
