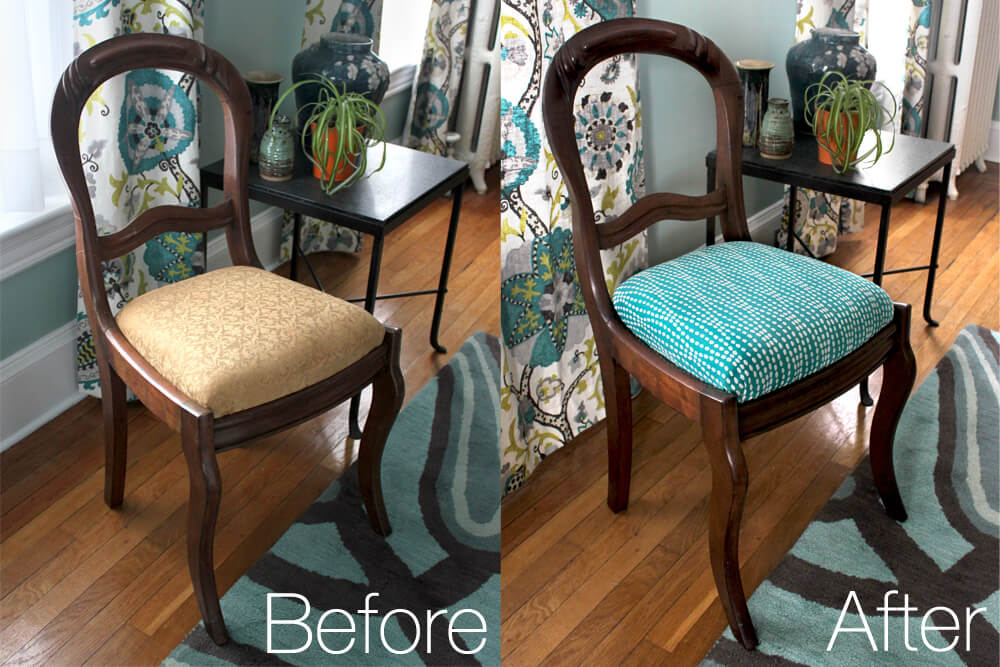
How To Reupholster A Chair
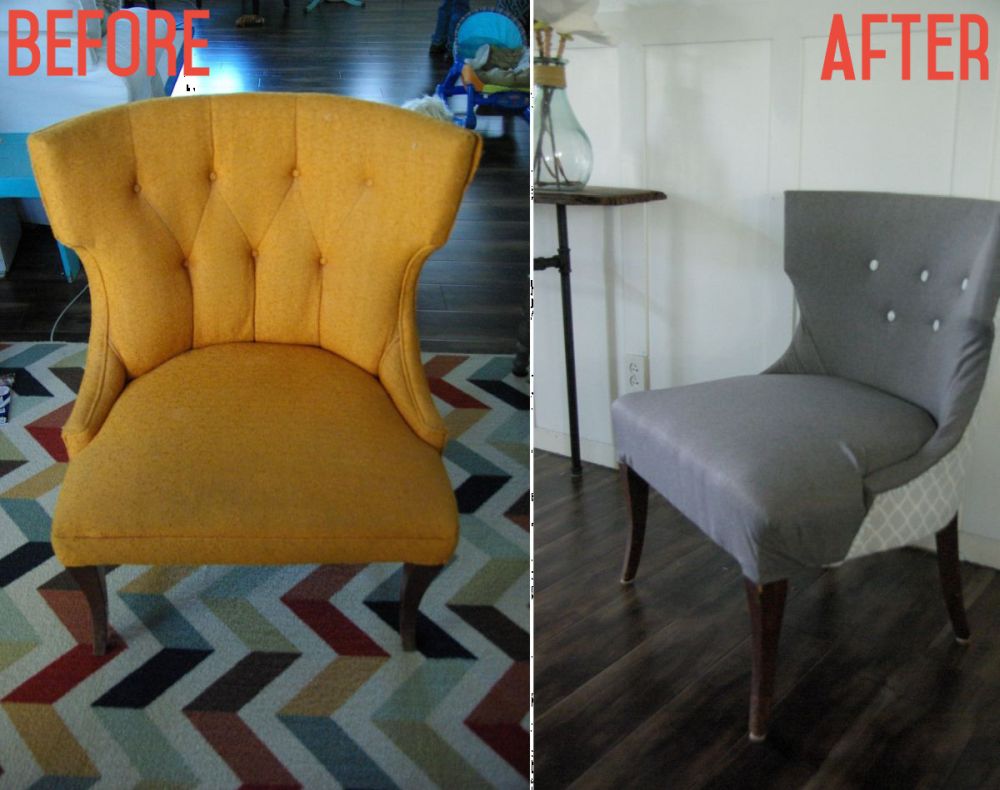
Reupholstering a chair is a rewarding way to refresh your furniture and give a tired room a new look without buying something new.
Preparing Your Chair for Reupholstery
Before you start cutting fabric or pulling out old cushioning, spend time evaluating the chair itself. Look at the frame for any loose joints, cracks, or wobbly legs, and tighten screws or add wood glue where needed to ensure a solid foundation. If the existing padding is lumpy, thin, or stained, plan to replace it with new foam or batting so the finished seat feels comfortable and supportive. Taking clear photos from different angles now will help you remember how components go back together once everything is disassembled.
Gather your tools and materials so you do not have to stop mid-project searching for supplies. You will typically need a staple remover, screwdriver set, pliers, utility knife, hammer, measuring tape, scissors, a staple gun, fresh upholstery fabric, new batting or foam, and strong upholstery glue. Wear gloves to protect your hands from old tacks, staples, and any residual dirt on the frame. Working in a clean, well-lit space with a sturdy work surface makes the process safer and more efficient, especially when you handle larger sections of fabric or padding.

Removing Old Upholstery and Assessing the Frame
Carefully remove the old fabric, starting with any decorative nails or staples on the back and sides of the chair. Keep a few strips of the removed fabric to use as templates for cutting new pieces, especially for shaped panels or complex curves. As you pull away layers, note how the batting and foam were originally positioned so you can replicate that structure for consistent support and appearance. If the old fabric is stuck with hardened glue or dirty residue, gently scrape the surface clean to prepare the frame for fresh padding.
Inspect the frame for any damage, such as splintered wood, loose spindles, or cracked rails, and make repairs before installing new cushioning. Lightly sand rough spots and, if desired, apply a fresh coat of paint or stain to refresh the chair’s color and grain. Remember that different woods and finishes may require specific adhesives or fasteners, so choose products that bond well with your frame material. Addressing these structural details early means your reupholstered chair will look polished and last much longer under daily use.
Choosing the Right Fabric and Padding
Selecting suitable fabric is one of the most important decisions in chair reupholstery, because it affects durability, comfort, and style. For high-traffic seating, consider performance fabrics, tightly woven cotton, or synthetic blends that resist stains, fading, and wear. If the chair is in a living room or family area where spills are possible, choose materials with a tighter weave and easy-clean properties rather than delicate or loosely textured options.
Along with fabric, the type and thickness of padding determine how comfortable the finished chair feels. High-density foam provides firm support, while softer cushion foam or layered batting creates a plush, sink-in feel. When you place new fabric over the padding, secure it with a staple gun, pulling each side evenly so the surface is smooth and free of dips or bulges. Over time, properly tensioned fabric and carefully shaped padding will help the chair keep its form instead of sagging.
Measuring and Cutting Fabric Accurately
Measure the chair panels carefully, adding extra inches to each dimension to account for wrapping around corners and attaching the fabric to the frame. Use your old fabric pieces as guides, or wrap the chair sections with a tape measure to note the exact lengths needed for sides, fronts, and backs. Mark cutting lines on the back of the fabric with chalk or a fabric marker so seams remain hidden once the chair is finished. Cut slowly and straight, using a rotary cutter or sharp scissors, to avoid jagged edges that could show once the fabric is in place.
Plan how pattern repeats will align, especially for stripes, plaids, or large motifs, so the design flows smoothly across adjacent panels. When you cut pieces for the seat, backrest, and arms, label each section and note the direction of the grain to prevent twisting or distortion after installation. Taking time with precise measurements and careful cutting reduces waste and makes the stapling and assembly steps much smoother.

Replacing or Refreshing the Cushioning
If you are replacing old cushions, remove the old batting or foam and use it as a template to cut new padding to the exact shape and thickness. For firm support, choose high-resilience foam, and for a softer feel, opt with quilted batting or a combination of foam plus softer layers. When you layer different materials, such as foam over cotton batting, the result can be both supportive and comfortable without excessive bulk.
Wrap the new padding in a protective layer of muslin or batting wrap to keep it clean inside the final fabric cover, especially on seats where fabric may come into direct contact with skin. Secure this wrapping with light adhesive or temporary stitches so it stays in place during the final upholstery step. Well-prepared cushioning keeps the chair comfortable and prevents the padding from shifting or bunching over time.
Attaching New Fabric and Final Touches
Begin attaching the new fabric by positioning the center of the material over the seat or panel, then work outward toward the edges. Use a staple gun to secure the fabric, starting with opposing sides and gently pulling to remove slack without distorting the pattern. Fold corners neatly, either by mitering them or creating hospital corners, so the finished look remains smooth and professional. Check alignment frequently, adjusting tension until the fabric lies flat and even across the entire surface.

Once all panels are secured, trim excess fabric and ensure no loose threads or staple ends are visible from the front of the chair. Reattach any decorative trim, piping, or welting, and replace buttons, tufting, or other details to match the original design or update it with a modern style. Inspect the completed chair for loose staples, sharp edges, or uneven surfaces, and make small corrections so the piece feels as good as it looks. When you finish these steps, your reupholstered chair will look like new and give you years of comfortable use.
Conclusion
With careful preparation, the right materials, and attention to detail, reupholstering a chair can transform an old piece into a fresh focal point for any room.
HOW TO REUPHOLSTER A CHAIR | THE LOOK FOR LESS
MASTER CHORE CHART PLAYLIST https://www.youtube.com/playlist?list=PLUg3bA2yGQX7giJpS6_9MJCteVuC7SPni Staple ...
